
Root rot in Calathea is a common problem. It’s crucial to diagnose root rot and treat root rot early before the root system dies and causing irreversible damage to the plant.
This detailed guide will teach you how to identify and save your Calathea from root rot, as well as what to do to prevent it:
- What is Root Rot
- What Causes Root Rot in Calathea
- Signs of Root Rot
- How to Save Calathea from Root Rot
- How to Prevent Root Rot in Calathea
What is Root Rot?
Root rot is a plant disease caused by overwatering, poor drainage, or soil fungal infection.
The waterlogged roots create an anaerobic environment where root rot pathogens can quickly damage root tissues and work their way up to the stems.
Like many plant diseases, chronic root rot is hard to treat, and prevention is the best way to avoid it.
Bloomsprouts may earn an affiliate commission if you purchase something through recommended links.
What Causes Calathea Root Rot?
Here’s the deal, root rot results in anaerobic environments where there aren’t enough oxygen levels in the soil for root tissues to remain healthy.
However, while root rot is generally caused by too much moisture in the soil, it can also be triggered by other factors:
- Overwatering
- Poor drainage
- Oversized pot
- Fungal infections
- Low temperature & cold drafts
- Over-fertilization
Overwatering
Overwatering is the main root rot culprit and occurs when you water your Calathea too frequently without allowing the soil to dry out between each watering thoroughly.
When your Calathea does not absorb water fast enough, excess water pools around the root ball. This lowers the amount of oxygen reaching the root system, causing it to suffocate and die.
Poor Drainage
Proper drainage is key to root rot prevention. When watering your Calathea, make sure the excess water drains freely from the bottom of the container. Root rot can develop if water does not drain properly.
Unfortunately, I used to put my Calathea in pretty ceramic pots with no drainage holes. This caused water to pool around the root zone, resulting in root rot.
On top of that, poor drainage can also result from dense and compacted soil that prevents air and water from flowing through the soil.
Make sure your potting soil mix is airy and well-draining!
Pot Size Too Big
You might believe that buying a bigger pot for your Calathea is preferable as you don’t need to purchase a new container as often.
However, if you put your Calathea in an oversized pot, some soil layers will be out of reach for the roots. Rootless sections can become too wet for an extended period, establishing the ideal anaerobic situation where root rot may thrive.
When repotting your Calathea, choose a container that is only 2 inches (5 cm) larger in diameter than the previous one. This size should keep you at least two years before you need to move into a bigger pot.
Fungal Infections
Many types of fungi can cause root rot for your Calathea, including Cercospora, Bipolaris, and Botrytis.
If these fungi are present in your potting soil, overwatering can cause root rot at a faster rate. Fungi can’t develop and cause damage unless your soil is waterlogged.
Since there is no single fungicide that will kill or inhibit the growth of all fungi, you need to identify the fungus type first.
Here’s a list of the fungicides that should be used for each kind of fungus that causes root rot.
Low Temperatures and Cold Drafts
Calathea goes into dormancy as the temperature drops below 60°F (15°C).
The plant’s photosynthesis and respiration rates drop significantly at this point. As a result, the root will not absorb as much water as it would during active growth in the summer and spring.
If you continue to water your Calathea as frequently as you did throughout its growing season, you will overwater the plant.
Use a soil meter to check moisture levels around the root zone. Only water the plant once the meter indicates the root zone is dry.
Too Much Fertilizer
Over-fertilizing your plant can lead to root rot in a few different ways.
Let me explain.
Excessive fertilization shrivels the roots of your Calathea and lowers the amount of water absorption from the soil to the plant. As a result, the soil around the root zone stays moist for longer, allowing anaerobic conditions to develop and promoting root rot.
Also, high-level salt concentration from fertilizer can burn Calathea’s delicate root tips. Thus, the plant’s ability to absorb water is reduced, becoming more prone to diseases.
Use a 10-10-10 general houseplant fertilizer every four weeks during the spring and summer for optimum results. You don’t need to fertilize the plant throughout the Winter when it is dormant.
How to Diagnose Root Rot in Calathea
You must detect signs of root rot in Calatheas as soon as possible so that the plant has a better chance of surviving.
Here are some signs that your Calathea is suffering from root rot:
| Early root rot signs | • Stunted growth • Rapid yellowing of leaves • Drooping leaves and stems |
| Advanced root rot signs | • Foul odor from the soil and plant • Black spots on leaves • Black and mushy roots |
| Beyond saving | • Black and mushy stems • All roots turn black |
Early Signs of Root Rot
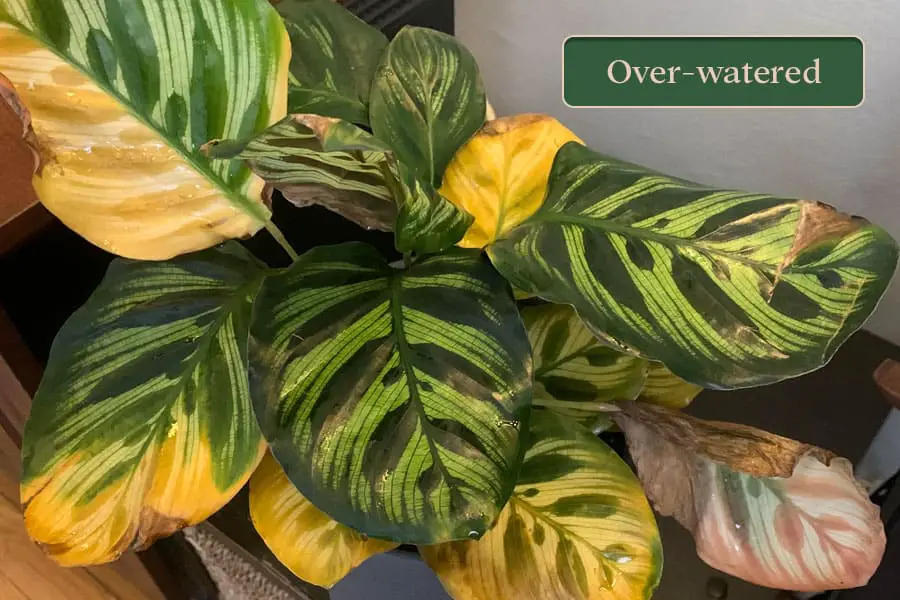
Generally, early-stage root rot signs are similar to those of overwatering, including yellowing leaves and stunted growth.
However, if you’ve been watering your Calathea yet the plant appears to be dehydrated and drooping, it can also indicate root rot.
The damaged roots in this situation cannot take up water fast enough to compensate for the photosynthesis and transpiration losses.
With early detection and the proper treatment, root rot is rarely fatal for your Calathea plant.
Stunted Growth
Naturally, Calathea will go dormant as the temperature drops during the Winter.
However, if you don’t water the plant properly during the active season, it will start producing smaller, thinner leaves or even stop growing new leaves altogether.
I used to water my plants every day, believing that, like us, plants require drinking water daily.
Unfortunately, the roots of my Calathea experience rot due to excessive watering, which prevents the plant from developing.
Rapid Yellowing of Leaves
Yellowing on Calathea leaves can indicate different plant problems, including overwatering and root rot.
But, you can easily distinguish the root rot start to develop when your Calathea leaves are rapidly turning yellow and wilted.
Calathea Plant Wilting
As I mentioned earlier, a drooping Calathea plant is generally a clear sign of dehydration and should not be seen in plants watered regularly.
However, if the plant has been overwatered for an extended period, it may develop root rot and droop.
As fewer viable roots are available to compensate for water loss from photosynthesis and transpiration, the plants begin to lose turgidity and droop.
Advance Root Rot Signs
Remember, if you ignore or overlook the early warning sign of root rot, your Calathea plant’s health will continue to deteriorate.
A foul odor from the soil and black spots appearing on the leaves are signs of advanced root rot in Calatheas.
When you notice any of these symptoms, remove the entire plant from the container so you can thoroughly examine the roots. If the roots of your Calathea turn black and mushy, you’re probably dealing with a severe root rot problem.
Foul Odor from Soil and Root
When your waterlogged soil is left stagnant for too long, root rot quickly develops and emits a sewage-like odor.
If you detect a foul odor, your roots are most likely already decaying. The stench comes from bacteria that thrive in an anaerobic environment.
Also, when the unpleasant odor gets stronger, it means you will be dealing with a more severe infection and difficulty in restoring your Calathea to good health.
Black Spots on Leaves
As the root rot progresses, the plant’s cells will die one after another as they can’t absorb enough oxygen, water, and nutrients from the soil.
The damage will spread from the root to the stem and leaves.
Eventually, your Calathea leaves will begin to get black spots, which might be accompanied by yellowing around the spot.
Black and Mushy Roots

A healthy Calathea root should be light yellow and firm. However, when root rot starts to develop, the root will turn dark brown or even black, and the texture will turn mushy.
A healthy Calathea root should be light yellow and firm. However, the root will turn dark brown or black and mushy as root rot develops.
When treating for Calathea root rot, you must remove all of the black and mushy roots. This is necessary to avoid infection from spreading to the remaining healthy roots.
Beyond Saving
Unfortunately, if you don’t catch all of the warning signals, all of the roots will turn black and rotted.
Without any viable roots, the plant can’t absorb any water or nutrients and will almost certainly die of dehydration.
At this stage, there is no way you can save your prized Calathea, even with propagation.
Except for Calathea Marantas, all other Calatheas varieties can’t be propagated via stem cuttings. When you plant a Calathea, you must divide the plant and ensure that the cuttings have healthy roots.
How to Treat Root Rot in Calathea
Root rot is a serious issue, and if it goes untreated too long, the effects can be irreversible.
Here are steps you can take to treat root rot in your Calathea:
Step 1: Inspecting for Root Rot
Although there are numerous symptoms of root rot in Calathea, the only way to be sure is to remove the plant from its container and examine the roots.
When removing the plant, don’t try to pull it out of the container by the stem. This will damage both the leaves and stems if done forcefully.
Instead, use one of your hands to cover the top layer of soil and turn the pot upside down with the other hand. Use a gentle shake to help the soil and plant slide out of the pot.
These are clear signs of root rot that you should keep an eye out for:
- Brown or black slimy roots that break easily
- Waterlogged soil
- Foul-smelling roots and soil
- Mushy roots and stem
Step 2: Rinse the Roots
Since the rot-causing bacteria thrive in anaerobic soil, we must remove completely infected soil from the roots.
Using your hand, brush away as much dirt as possible before rinsing the remaining soil that sticks to the roots with water. While you rinse the roots with water, the mushy roots should come off relatively quickly.
Once you’ve removed the soil, you’ll be able to see how far the rot has progressed.
Step 3: Cut Damage Roots
Now that you can see the root rot affecting your Calathea, trim away all of the rotten black roots using a pair of sterile scissors.
Don’t leave any behind! You don’t want the remaining root rots to spread and infect the healthy roots after repotting them.
Nevertheless, if the root rot has only occurred halfway along the root, just cut the rotten part with a half an inch overlap in case there’s still an infection we haven’t detected. Do not cut all the way to the base of the plant, as these roots might still be healthy.
Step 4: Disinfect with Hydrogen Peroxide
Just to be safe, dilute one part of 3% Hydrogen Peroxide with two parts of water and use it to disinfect the remaining roots.
Dipping the healthy roots in the solution ensures that all root rot-causing bacteria and pathogens are eradicated.
Alternatively, if you don’t have Hydrogen Peroxide on hand, you may also use bleach. Use 4 to 6 drops of bleach to one quart of water.
Allow your roots to air dry while you prepare the new soil and pot.
Step 5: Repot into Well-draining Soil
Remember, do not reuse your previous contaminated substrate, and if you must use the old pot, sterilize it with bleach.
Ensure to provide your Calathea plant with airy and well-draining soil to avoid waterlogged conditions in the future.
Here’s another tip, if there is a substantial root loss, you should consider downsizing your pot to ensure that the plant does not get overwatered after being repotted.
Step 6: Skip Fertilizing the Plant
If your Calathea is deprived of nutrients, the plant will redirect its energy to develop its root system rather than generating new leaves. This adaptive behavior helps the plant to source the missing nutrients.
Consider skipping feeding your plant for eight weeks after repotting to allow the root system to develop.
Step 7: Prune the Existing Leaves
This may seem counterproductive, but you may need to trim most of the healthy leaves from your plant for it to have a better chance of survival.
The diminished root system will not be able to provide enough moisture for the entire plant, causing the plant to droop and wilt.
Ideally, you should remove an equivalent proportion of foliage for the amount of root lost.
For example, if you just remove one-third of your root system, then you will need to cut about one-third of your Calathea leaves.
How to Prevent and Control Calathea Root Rot
While it is possible to cure root rot in Calathea, it’s much easier to provide the plant with proper care to prevent it from developing in the first place.
Here are some prevention methods to avoid root rot:
Apply Natural Fungicide Regularly
As mentioned earlier, fungi can speed up root rot when you overwatered your Calathea. For this reason, you need to make sure that your potting soil is fungi-free.
Personally, I sprinkle cinnamon powder into my potting soil to prevent fungus from growing. Cinnamon is, in fact, an excellent natural fungicide, pest deterrent, and rooting agent.
Add Hydrogen Peroxide to Watering Can
Hydrogen peroxide is beneficial in numerous ways. It kills bacteria and germs that induce root rot and adds oxygen to the root system.
The extra oxygen in the soil prevents anaerobic conditions that encourage root rot and encourage root growth!
Proper Drainage
You need to ensure that your Calathea pot has drainage holes to allow excess water to drain out.
Avoid using pretty pots without a drainage hole, as it will undoubtedly cause waterlogging. You can fix this by drilling a drainage hole or use a plastic container with drainage inside the lovely pot.
Aerate the Soil
Your Calathea soil also requires aeration in addition to proper drainage.
When repotting, adding perlite, pumice or gravel to your potting mix will allow the water to flow more freely through the soil and provide greater oxygen access to your Calathea roots.
Avoid Over-watering
Even though you have well-aerated and draining soil, you can risk overwatering your Calathea if you water too frequently.
Generally, you need to water your Calathea once a week or when the top 2 inches of the soil is dry. You can use your finger or a moisture meter to see whether the soil needs to be watered right away.
Avoid Over Fertilization
Overfeeding your Calathea will scorch the roots and limit moisture absorption, which can lead to waterlogged soil.
Generally, you only need to fertilize your Calathea once a month during the spring and summer. During the Winter, stop feeding your plant since it goes dormant.
