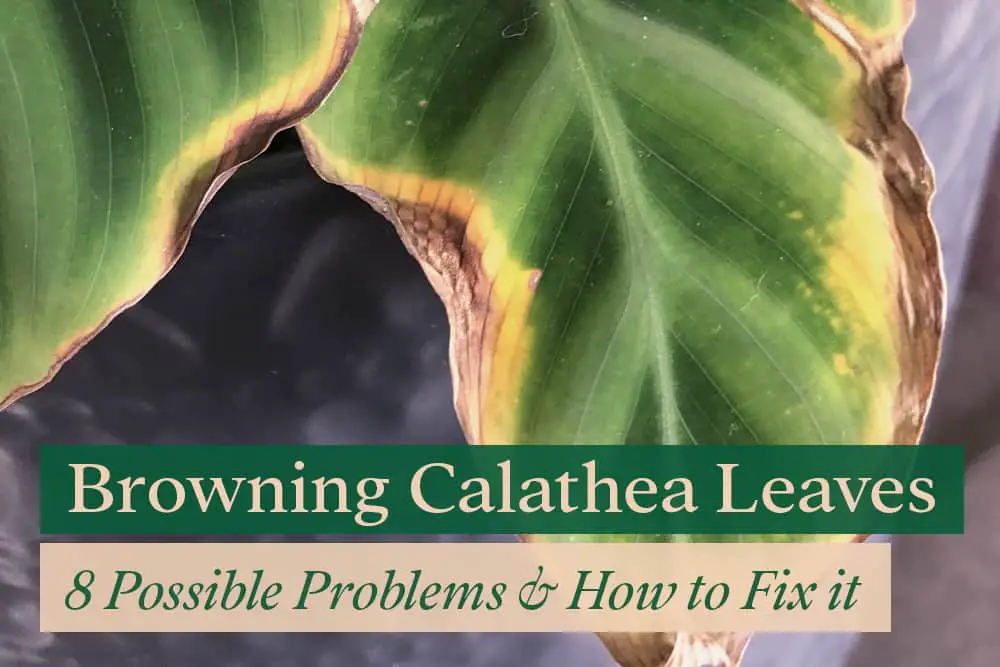
Is your Calathea leaf turning brown at the edges? Do you need to trim it before it gets worse?
Generally, underwatering and low humidity are the most common causes of browning Calathea leaves. However, other factors such as overfertilization, heat stress, transplant shock, pest infestation, and fungal infection can also cause browning. While brown leaves cannot turn green again, their edges can be trimmed to make them look healthy.
This article will explore how to diagnose the root cause of your browning Calathea leaves and how to fix it to prevent further damage.
Let’s get started!
Most Common Causes of Brown Calathea Leaves
Even though there are many reasons why Calathea leaves may turn brown, the main culprit is moisture stress resulting from underwatering or low humidity.
Most of the time, this is a mild problem that can be resolved by providing the plant with proper watering and higher humidity.
Let’s take a closer look at each issue.
Inconsistent Watering Habits – Underwatering
When was the last time you watered your prayer-plants? If you can’t remember, there is a high chance that it is underwatered.
Generally, Calathea plants require weekly watering to thrive. However, the frequency may vary depending on the environmental conditions and the plant’s size.
In most cases, if the top 2 inches of soil are dry, you should water the plant right away, as it is not very drought-tolerant and can develop browning quickly.
Signs of underwatered Calathea
If the browning of your Calathea leaves is accompanied by droopy, yellowing, curling and dry leaves, it’s likely your plant has been underwatered.
Stick your finger into the soil. If it feels dry and no dirt sticks to your finger as you pull it out, then it is confirmed that the plant is dehydrated.
Alternatively, you can use a soil meter to get an accurate reading of how dry the soil is. These can be found online or at nearly any garden centre.
How to fix underwatering
Here’s the deal, treatments can vary a little depending on how long your soil was dry.
You can just give your Calathea a deep soaking if you are a few days behind on your watering schedule.
However, if you forget to water your Calathea for a while, or if you just returned from a long vacation, your soil might become hydrophobic.
This means that the soil cannot absorb water quickly enough and does not store water for the plant to use.
Instead of watering your Calathea plant with a watering can or hose, you should submerge it in a bucket of lukewarm water for 10 minutes, or until no air bubbles float to the surface.
Remove the pot and let the excess water drain through the drainage hole at the bottom. Feel the soil. If it doesn’t feel moist yet, repeat the process until the soil feels wet.
The pot should then be placed in a shady, cool location. The following day, you should see your Calathea looking healthy again.
Lack of Humidity
Calatheas are native to tropical regions in the jungles of South America, so they tend to prefer higher levels of humidity.
For most Calathea, a humidity level of at least 50% is needed, but delicate ones like Calathea Orbifolia, Zebrina and Medallion need at least 60% humidity.
In fact, my Calathea plants begin to develop brown leaves tips as humidity levels drop below 40% in the Winter.
Signs of low humidity on Calathea
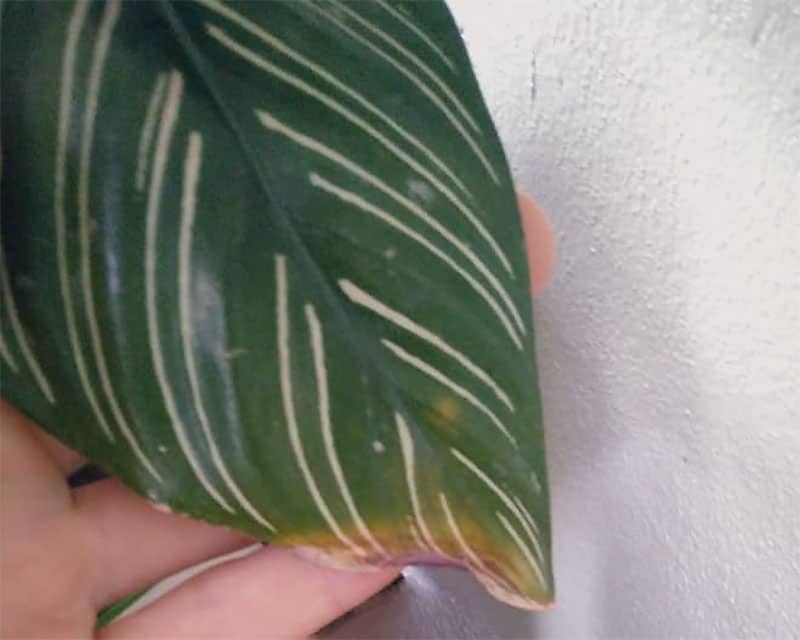
Typically, when your Calathea is stressed from the lack of humidity, you will notice brown tips that gradually spread throughout the leaf.
Leaves may also turn yellow, droop, and become crispy to touch if low humidity continues for an extended period of time.
If your Calatheas are suffering from this issue now, then you must immediately measure your room’s humidity level
How to measure your humidity
In many cases, low humidity is often confused with underwatering, as the signs can be nearly identical.
You can use a hygrometer to accurately determine whether the humidity level of your room is suitable for your Calathea plant.
But, if you don’t have a hygrometer at hand, you can try the Ice Cube method for testing humidity.
Simply place three ice cubes into a glass and fill it with water. Stir the glass and let it sit for five minutes. When you don’t see any moisture forming on the glass, it means the air around you is very dry.
How to improve humidity levels for your plant
The internet is full of ways to improve room humidity, and I’ve tried them all!
Using pebble stones or misting your Calathea improves your room’s humidity temporarily. However, you need to repeat the process every hour to maintain the effect, which is incredibly inconvenient!
You can also group your plants together in the hopes that the moisture these plants release through transpiration will create a more humid microclimate around them. The method works, but there is only a very slight increase (about 5% increase), so it isn’t very effective if you have very dry air.
Now, the best and most convenient way of improving humidity is to use a humidifier. Today, you can purchase a high tech humidifier complete with a sensor, timer and smartphone integration for less than $100.
These features allow you to maintain the humidity levels inside the room without over-saturating the air and causing the Calathea to become infected with fungus.
Humidifiers work best in a specific room rather than a large, open area. Consider having a particular location where you keep your higher humidity-loving plants and your humidifier.
Other possible reasons for Brown Calathea Leaves
Salt Build-Up in the Soil – Over-fertilizing
Despite the need for fertilizer during their growing season, excessive use can also cause your Calathea leaves to turn brown and make them more susceptible to pest infestation and disease.
In general, you should fertilize once every four weeks during spring and summer. As Calathea goes into dormancy in Winter, feeding it is not necessary during this period.
Make sure that you dilute your balance fertilizer to half its recommended dosage to reduce the chances of over-fertilizing.
Signs of over-fertilized Calathea
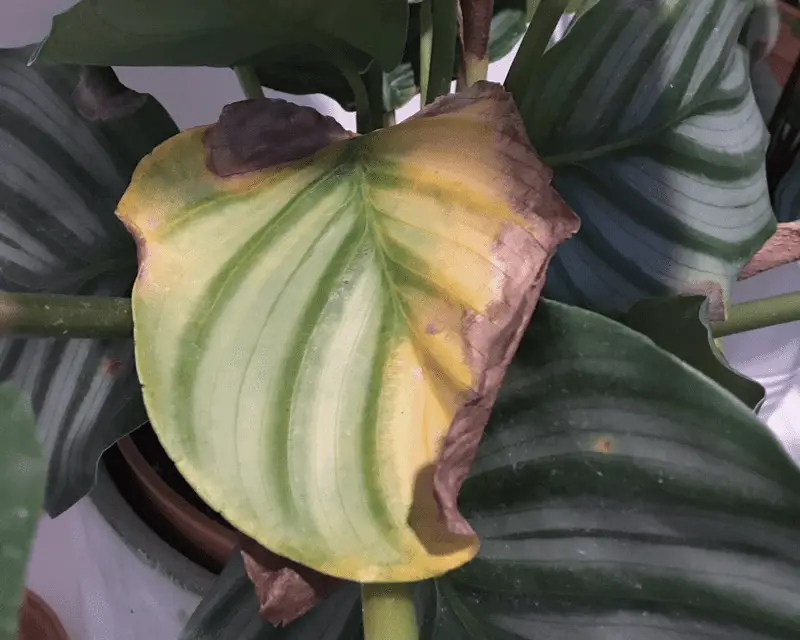
Browning at the tips and margin of the leaves can be a telltale sign of overfertilized Calathea. In most cases, the lower leaves will also turn yellow and wilt.
Even though the signs above can be mistaken for overwatering or root rot; if you begin to observe white crusts forming on your potting soil, you are likely overfeeding your Calathea.
In that case, be sure to inspect your root ball and determine the extent of the damage. When the roots are limp and black, the damage is already extensive and need immediate treatment.
Leaving your overfed Calathea unattended for a long time may result in it ceasing to grow and eventually dying.
How to fix over-fertilization
If you think you have over-fertilized your Calathea – don’t worry! There are several steps you can take to help your plant find its balance.
You should first try to remove as much excess fertilizer from the soil surface as possible, without removing more than 25% of the potting soil. Removing too much soil will shock your plant.
After that, you can start flushing the remaining fertilizer out of the soil by watering it. Make sure that your container has adequate drainage holes so that excess water can drain away completely.
It might be necessary for you to repeat this two or three times over the next few days to remove all fertilizer from the roots.
Lastly, do not fertilize your Calathea for at least a month after you have leached the extra fertilizer from the soil.
Temperature Stress
Extreme temperature changes caused by hot spots or cold drafts can also cause browning leaves in your Calathea.
You can cause hot spots by placing your Calathea too close to a heater, radiator, or window. Ideally, Calatheas prefer temperatures between 65°F to 85°F (18°C to 27°C). A temperature higher than that will cause your plant’s leaves to wither and shrivel.
In addition, cold drafts or sudden temperature drops can also deeply stress your plants. Your plant could suffer a temperature drop if it is placed near a vent or if it is exposed to a draft coming through a nearby window.
Signs of heat stress in Calathea
Calathea under heat stress usually displays droopy and wilted leaves due to excessive transpiration and evaporation.
Eventually, the plants will eventually dry up, turning a crunchy brown before dying. Sometimes, yellowing on the leaves will also occur.
If the plant is exposed to excessive heat for an extended period of time, it eventually dries up, becomes crunchy, and eventually dies. Occasionally, you may notice that the leaves turning yellow from the heat.
How to avoid and recover from heat stress
If your Calathea appears to be suffering from heat stress, move it to a place that is farther away from the heat source.
If necessary, you could move your potted Calathea indoors or to an area with shade. Or, you might also need to hang sheer curtains to block direct sunlight into your room.
Next, check the soil, as the heat will probably also cause the plant to be dehydrated. If this is the case, make sure the soil is thoroughly watered.
Again, do not fertilize your Calathea when it is experiencing heat stress.
Signs of cold stress in Calathea
Calathea plants are particularly sensitive to cold, so cold drafts or temperatures below 55°F will cause stress symptoms.
The cold can damage plant cells, causing them to freeze and interfering with the flow of nutrients and water.
A lack of water and nutrients will cause the leaves to droop, turn brown, and shrivel up.
How to avoid and recover from cold stress
During the colder winter months, make sure your plant is not near or beneath any vents or windows that can cause drafts.
If your Calathea lives outdoors, bring it indoors before the colder winter months or cover it at night if you anticipate cold temperatures.
If you remove your plant from the location where it is experiencing too much stress, it will recover in a few days.
Transplant Shock
There is also a possibility that Calatheas’ leaves will turn brown after transplantation and propagation.
Calatheas may experience stress when transplanted into new soil. Several problems may arise from the sudden change in environment, which is known as transplant shock.
Transplant shock impairs the roots’ ability to absorb water and nutrients. The plant cells die without enough moisture, causing the leaves to turn yellow and brown.
Signs of transplant shock in Calathea
During transplant shock, some of the leaves will show signs of leaf scorch where the margin, tips and veins are turning yellow.
On top of that, the leaves will also wilt and curl at the edges.
Regardless of how well you recover from transplant shock, some plants will still suffer from brown spots on leaves.
How to prevent and fix transplant shock
It is easier to prevent transplant shock than to cure it, which means you must handle repotting or propagating with extra care.
In order to accomplish that, you must disturb the roots as little as possible. It is always best to have the plant transplanted with as many roots as it originally had.
Furthermore, the rootball needs to be kept moist during the transplanting process and then watered thoroughly afterwards.
However, if your Calathea is still experiencing transplant shock, you should prune away the damaged leaves so the plant can focus its energy on recovering and growing new leaves.
You just have to be patient as Calathea may take up to four weeks to recover from transplant shock. However, studies have shown that adding a solution of sugar and water to the soil can speed up the recovery process.
Pest Infestation
Do your Calathea leaves brown a few weeks after you purchase a new plant?
If so, there is a possibility that your new plant came with pests that made their way into the rest of your collection, including your prayer-plants.
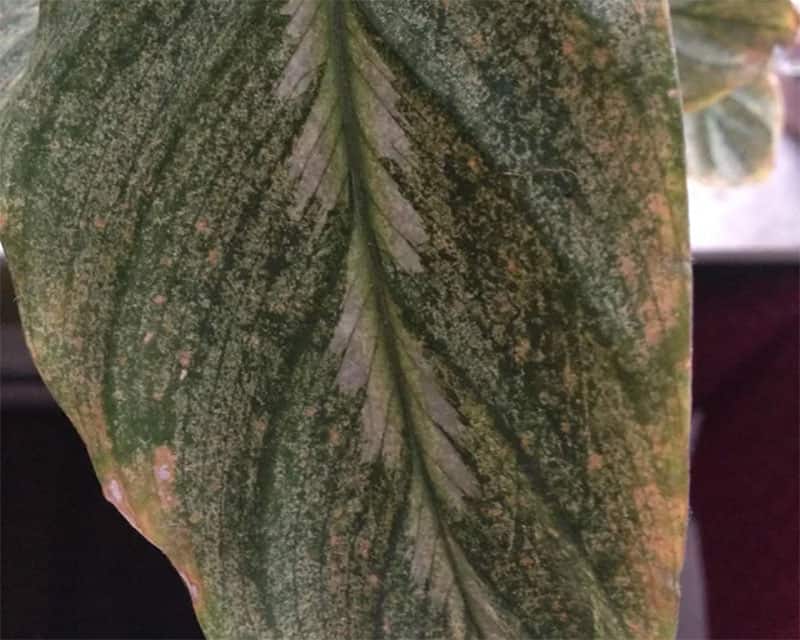
Pests such as mealybugs, scale, spider mites, and aphids feed on sap within the plant tissues. Brown spots will appear on the damaged areas as a result of feeding.
You should always watch out for brown spots on your plant’s leaves, either around the edges or closer to the stem.
Signs of pest infestation in Calathea
Spider mites are by far the most common pests to attack Calathea.
When you suspect brown spots are caused by spider mites, you might want to check the underside of the leaves.
Despite their small size, they are easily identifiable on plants due to their white or reddish-brown color. Since spider mite eggs are invisible to the naked eye, you can only tell if you have an infestation if you see the adults.
However, there is a more reliable way to determine spider mite infestation. If you see webbing on stems or leaf undersides, you can be sure that your Calathea is infested.
In some cases, you may also notice that your Calathea’s leaves stop closing at night.
How to get rid of and prevent pest infestation
As a first step, quarantine your infected plants and keep them away from healthy plants as spider mites can quickly spread.
Cut off any dead or damaged leaves with a clean, sharp knife or shears since they may harbor pests and put a strain on your Calathea.
Next, you can use ready-to-spray insecticidal soaps or dilute liquid Castile soaps to kill the spider mites. These soaps contain fatty acids that are necessary to dissolve the mites’ exoskeletons, causing them to suffocate and die.
Before spraying the entire plant, it is a good idea to test the spray on a small section of a leaf. Check your plant after a day to make sure the spray did not damage it.
As long as there are no adverse effects, you can spray your Calathea every four to seven days on both the upper and lower sides of the leaves until it is spider mite free!
In order to protect your Calathea from future pest infestation, you can spray it with neem oil regularly every two weeks.
Disease and Fungal Infection
Several fungal infections can also cause brown spots to develop on Calathea leaves.
Calathea leaves can become infected with this fungus if they remain wet for an extended period after being watered.
Signs of fungal infection in Calathea
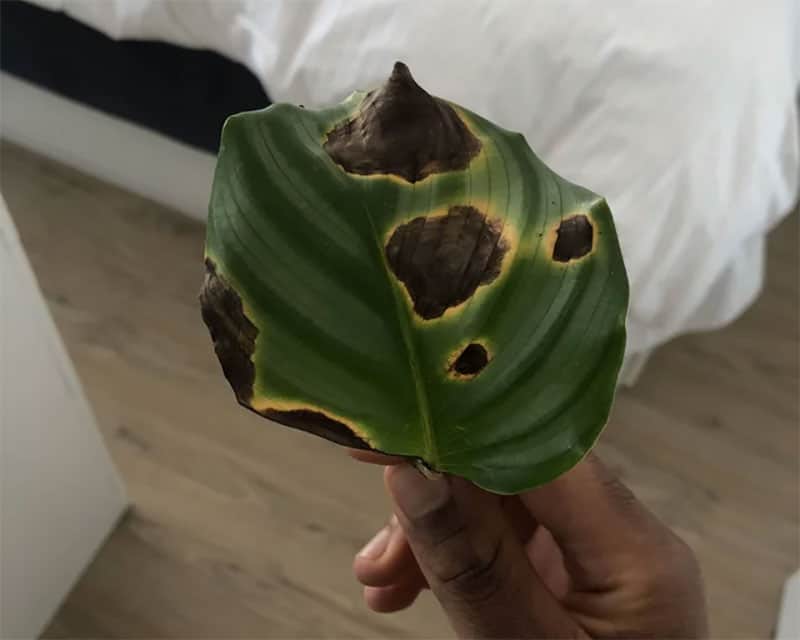
Symptoms could include large brown spots about 0.5 to 0.75 inches (12–18 mm) in diameter on the leaves that spread quickly.
In some cases, these spots might be accompanied by yellow rings around them.
How to treat fungal infection
To treat fungal infections, you can use either a commercial or natural fungicide to kill or prevent the growth of fungi and their spores.
I do prefer a more natural approach. A mixture of baking soda, liquid Castile soap, and water can be used to treat fungal spots on Calathea.
This mixture should be used only on cloudy, evening days, as a hot, sunny day can burn foliage.
Although it won’t cure the browning on your leaves, it does effectively prevent the fungal infection from spreading.
Ageing Leaves
Even if you take the best possible care for your Calathea and provide it with a conducive environment, a few of its leaves will turn yellow and eventually turn brown as they get older.
In order to make room for new growth, the plant sometimes drops its older leaves as it matures and grows.
Unless this occurs on a regular basis, there is little reason to be alarmed.
Should I remove brown leaves?
You have two options when it comes to removing brown leaves from your Calathea: pruning or trimming the foliage.
If a leaf is entirely brown, you should prune it off so the plant can focus its energy on keeping the healthy leaves and growing new ones.
By using a pair of clean pruning shears, cut the leaf at the base from the plant.
When only the tips of your plant’s leaves turn brown, trim off the tips or edges rather than removing the entire leaf.
Can Brown leaves turn green again?
When the leaves have turned brown, the plant cells in that leaf section have died and lost their green pigment chlorophyll.
Unfortunately, It is impossible for the leaves to turn green again once they turn brown.
You’re better off trimming the brown edges off or cut back the entire leaf to promote new growth.
