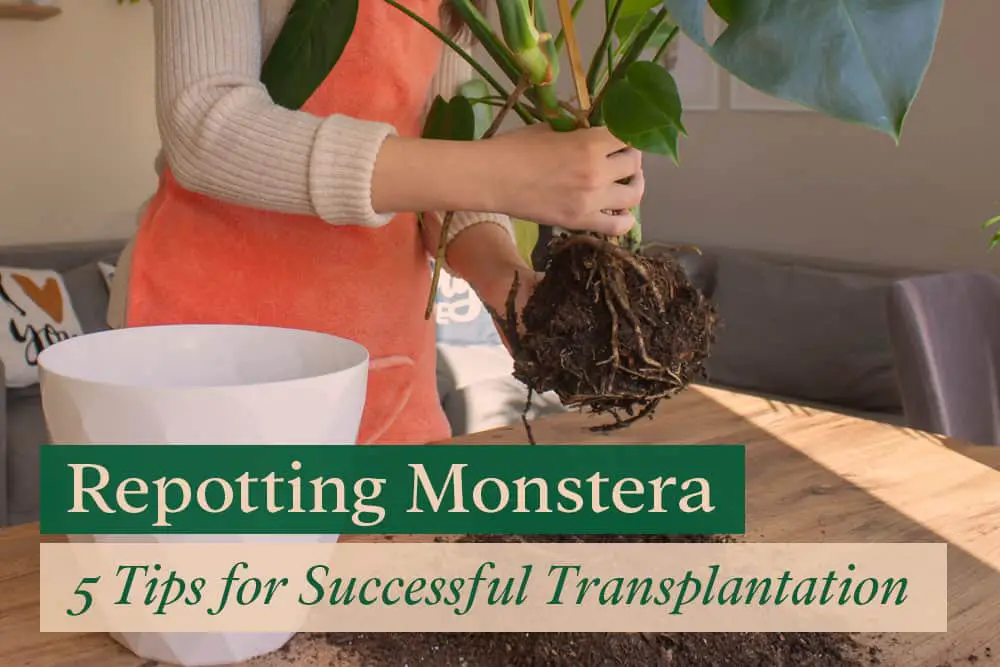
You probably feel that your Monstera has outgrown its current pot and may tip over anytime soon! So how do you repot the Swiss Cheese plant without causing transplant shock?
In general, Monstera needs to be repotted every 2 years or whenever its growth stunted due to root-bound. Make sure to pick a pot 2 inches larger in diameter and use aerated well-draining soil for the best result.
After reading this article, you’ll know things to consider before repotting that will help you avoid the risk of root rot and transplant shock. Also, I will share my personal tips and experience on repotting my Monstera Deliciosa.
Let’s get started!
Should I Consider Repotting my Monstera?
Monstera plants require repotting from time to time. You can plan to repot your Monstera in advance or it may show some signs that it is ready to be repotted. But, it is really important to pay close attention to these signs so that your Monstera can continue to thrive.
Signs Your Monstera need Repotting
Roots growing through the drainage holes
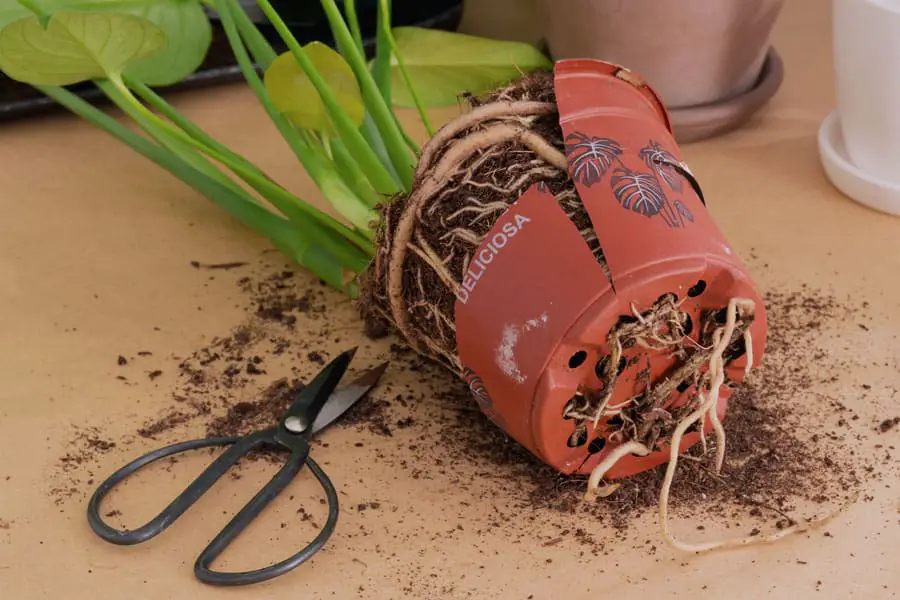
Overgrown roots are one of the primary signs that you need to repot your Monstera plant. If its roots are growing through the drainage holes in the plant pot, this means the plant is root-bound.
A root-bound plant doesn’t have enough soil and space to grow, leading to a deficiency of oxygen, water, and nutrients. Repotting can prevent the roots from being suffocated or damaged in a pot that is too small.
Stunted growth
Root-bound plants lack space to grow and are unable to uptake the nutrients they need. This leads to stunted growth and if unchecked, will eventually lead to the death of the plant. Thus, stunted growth is often a glaring sign that you need to transfer your plant to a bigger pot.
A larger pot with new potting mix can give your Monstera plant the boost it needs to generate new growth.
However, there may be other reasons why your plant is not growing – like insufficient light, underwatering, or inadequate fertilizer – so it is important to investigate before you take the step of repotting it.
Reasons Why You Should Repot
Repotting is necessary if your Monstera becomes root-bound. This means that the roots grow so dense circling within the pot that they take up all the room that should otherwise be filled with soil.
This can prevent the plant from getting enough water as the water cannot be retained when there is insufficient soil. Thus, your plant can become dehydrated and you might notice that the leaves start to turn yellow or brown color.
How Often Should You Repot?
Monstera plants need repotting from time to time so they can thrive. On average, Monstera should be repotted every two years to give it the healthiest environment which promotes growth.
Generally, a young Monstera plant will need to be repotted more often than mature plants. A mature monstera in a pot that is eight inches in diameter or larger should be top-dressed with fresh potting soil rather than repotted.
Things to Note When Repotting
When you decide to repot your Monstera, it is important to plan the transplantation thoroughly. You will need to pick the right pot, choose the best type of soil for your plant, and be aware of how to care for your plant after repotting it.
Best Time to Repot Monstera
The best time of year to repot your Monstera is during the early spring, just as it is approaching the growing season. This can give it the greatest chance to adjust to the new conditions in a different pot and fresh soil.
However, you can repot your plant at any time of the year, if you notice urgent signs that it requires repotting. In these cases, your plant may need extra care to prevent it from becoming distressed after the transplantation.
Pick your new pot
If your Monstera requires repotting because it has outgrown its previous pot, then you should pick a pot 2 inches larger in diameter. It allows sufficient room for the plant to continue to grow healthily without being too large. An oversized pot can lead to overwatering your plant because you may not be able to tell how much moisture is in the soil.
Also, the pot must have enough drainage holes to allow water to adequately drain from the bottom of the pot, thus preventing root rot.
Some plant owners prefer to make their own pots, using recycled materials, rather than opting for store-bought pots. These types of pots can be eco-friendly, but you must prepare them correctly before repotting your Monstera. If you’re making your own pot, you must drill a hole yourself into the bottom of whatever container you’re using to repot your plant so that the water can drain from it.
Also read: Choosing the Best Pot for Monstera
Select the right soil mix
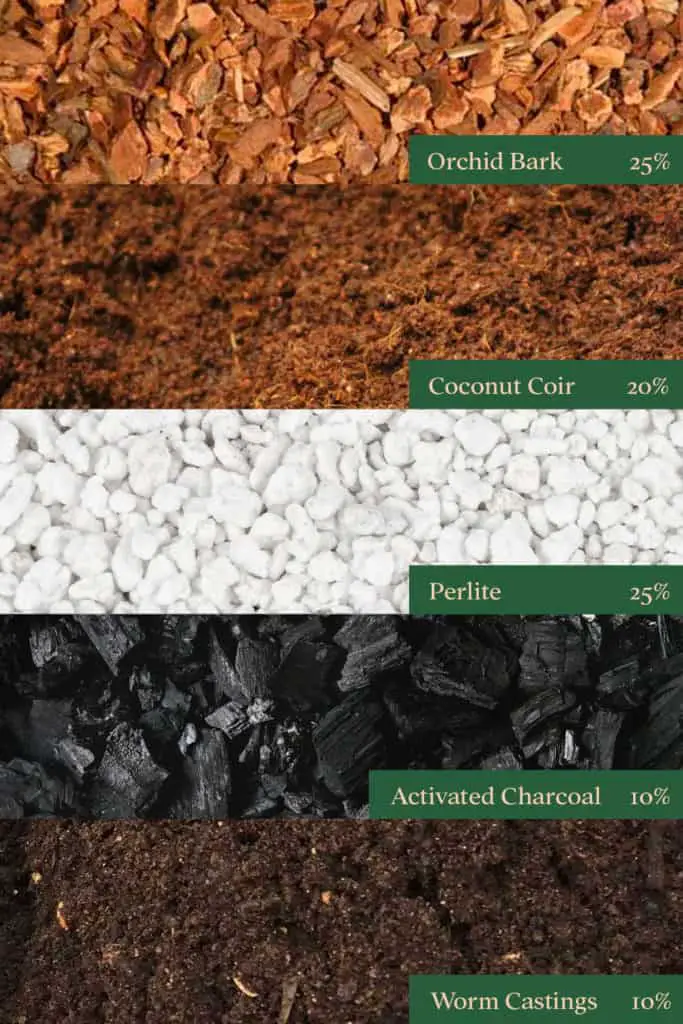
Monstera prospers in aerated and well-draining potting mix. The aeration in the soil allows even distribution of moisture and helps oxygen flow through the roots.
While good soil drainage allows water to move through the soil at a moderate rate without puddling, so plants have time to properly absorb the water.
Quick-draining and nutrient-dense soil is available in most stores and online outlets. However, if you cannot find it, add peat moss, orchid bark chips, coconut coir, and perlite into the soil to lighten it. This will help the soil to drain more easily and prevent your Monstera from suffering root rot.
Also read: Best Soil Mix for Monstera – How to Make Your Own
Installing Support if Needed
Larger Swiss cheese plants will require a trellis or a moss pole for vertical support. You can even preemptively add a trellis before the plant grows large. It’s wise to decide where you are going to place the moss pole into the soil before placing your monstera plant into its new pot.
The positioning of the pole is very important. If your plant is growing upward and looks balanced, then you can place the pole in the center of the pot. However, if the plant is tilting or needs more support on one side, then position the pole accordingly.
When the monstera is in the pot, place the pole deep into the soil so that the soil will hold it up. Fill in the soil around the pole to make sure it’s sturdy and will support the plant. Use plant ties to attach your Monstera to the moss pole.
Read this blog post to learn more about how to train Monstera to climb around a support
Watch for signs of distress or transplant shock
Repotted Monsteras can often suffer from transplant shock after their move. This is normal and occurs in many plants to some degree once they have been moved. However, there are some ways to minimize the disturbance.
- Try not to disrupt the roots too much when you remove the Monstera from its old pot and move as much of the roots to the new pot as possible.
- When you take the Monstera out of its pot, don’t shake away any soil from the stiff roots or injure the root ball. At the same time, try to keep the root ball moist while it is out of the pot. A dry root ball can lead to damage to the plant.
- Once your Monstera is settled in its new pot, hydrate the plant by thoroughly watering it. Giving it plenty of water can help it settle into its new home and reduce the risk of transplant shock.
Don’t forget to be vigilant once your plant has been repotted. Keep an eye on it and watch out for any signs that your Swiss cheese is in distress. Some of the main signs of distress include:
- Drooping leaves
- Browning leaves
- Yellowing leaves
If you notice these signs, care for your Monstera by giving it the right amount of water, light, nutrients, and humidity so that it is in the best conditions to recover. On top of that, you will have to be patient as your Monstera recover on its own. Younger monstera tends to recover in a few weeks, while mature Monstera may take months even years.
Best After Care for Repotting
Once the Monstera is settled in the new pot, place it back in its original location. Ensuring that you retain the same conditions for the plant lessens the chances of transplant shock. Therefore, it is crucial to maintain the same environment.
One of the most important steps is to thoroughly water the Monstera as soon as you have repositioned it. Don’t skip this step as it can also reduce any risk of transplant shock whilst simultaneously helping your plant to thrive. When you water the plant, be careful not to overwater as it is crucial to keep the roots from becoming waterlogged.
Also, avoid using any fertilizer for around 4 weeks following its transplant. This can prevent the new roots from being burned.
Lastly, it should also have high humidity and enough indirect, bright sunlight. Keeping the plant by a northern window is perfect for promoting new growth and gives it the best chance at avoiding shock.
How to Repot a Monstera
Repotting your Monstera is straightforward as long as you follow some crucial steps. Following these steps will make the transition easier for your plant and reduce the risk of transplant shock too.
Step 1: Prepare a new pot, soil, and support
Before you get started, ensure that you have everything you’ll need to successfully repot the plant. These include clean shears, your aerated well-draining soil mix, moss pole (if needed) and pot. Remember that good drainage is the key for both the soil and the pot.
Sanitize your workspace or you can cover your table to lessen the mess and make it easier when you come to the cleanup.
To prepare your new pot for planting, place some of the fresh soil inside it so that it is around one-third full.
Step 2: Remove the monstera from its old grow pot (you might need help).
Cautiously remove your Monstera from its old grow pot, taking care not to disturb the roots. Some people cut the aerial roots to ease the process. But I prefer to keep it and bury the longer ones into the new potting mix. I found that it helps to reduce the effect of transplant shock.
Also, remember to ask someone to help you repot a large Monstera plant, as this can reduce the risk of damaging the plant during its repotting.
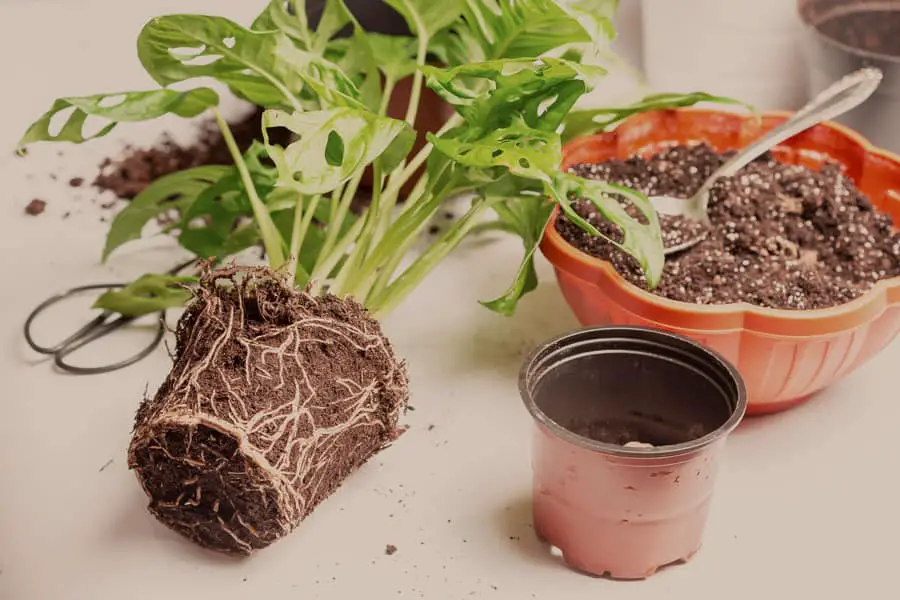
Step 3: Put the plant in the new pot
Place the Monstera into the new pot. Ensure that it’s at the center of the pot and its rootball is several inches below the pot’s rim. Now you can fill up the rest of your pot with soil. However, do not overpack the soil or press it down. Loosely packed soil makes it much easier for the roots of the Monstera to breathe.
Step 4: Water well
Now, you should give it plenty of water until the water comes out of the drainage holes. Do not use tap water as it may contain chlorine which may harm the plant. Use rainwater or filter water instead.
Initially, the soil will sink a little as you water your newly repotted Monstera. Top dressing it with more soil mix might be necessary.
Your Monstera will most probably experience transplant shock, so make sure to continuously give it proper care and avoid the use of fertilizer for the next month.
It’s not as hard as you thought! Right?
