Are you wondering what to do with the freshly trimmed Monstera cuttings? You can propagate them into new plants!
Monstera can be propagated both in water or soil but cut the plants at least an inch below its node to give room for roots to form. The roots should develop well within a month, given that proper care is given.
I have created an in-depth guide to propagating the Swiss cheese plant. This article discusses three different propagation methods, points out common mistakes, and offers insights on what will help ensure success.
Let’s get started!
Why You Should Consider Propagating Your Monstera
One year ago I bought my first Monstera plant with just three leaves and now there is a jungle in my living room! All because I keep propagating pruned cuttings of my Monsteras.
Here are a few reasons why you might want to propagate your Monstera:
- Obtain free new plants from old cuttings instead of buying new ones.
- You can give them to family members and friends as unique gifts for different occasions
- With lots of new Monstera plants, one may randomly mutate and develop variegation.
- Last but not least, you can always sell the new plants!
How to Propagate a Monstera
You might be thinking “propagation sounds complicated” but I’m here to tell you it’s pretty straightforward!
Make a 45-degree angle cut at least an inch below a Monstera node. You can either plant the cutting in soil or leave it to root in water for at least a month before planting.
Here is a more detailed step-by-step guide for propagating Monstera:
Identify Monstera nodes
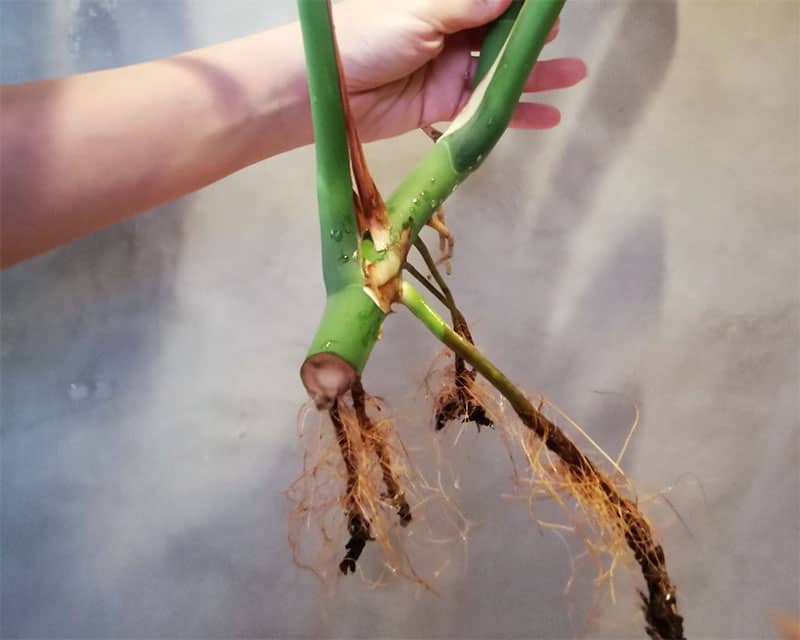
Look, you can’t simply cut parts of Monstera and expect it will grow roots. To be successful in propagating, you need to include at least one node on the cuttings.
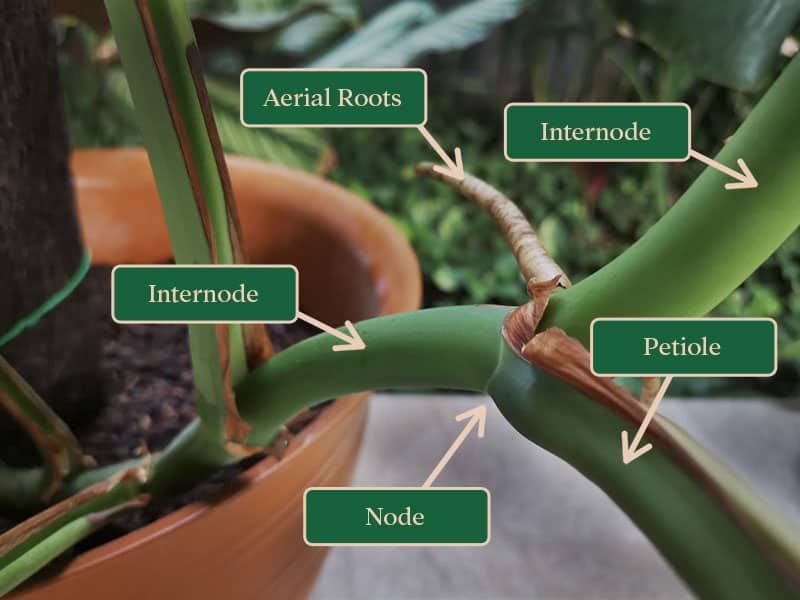
The nodes are bumpy, light green circular rings on the stem from where leaves, stems, and roots originate.
Plan the cuttings
I planned my cuttings to include a node and at most two leaves. If there are more than two leaves on the cutting, I will probably be able to find another node and divide them into two smaller cuttings.
One of the benefits to this approach is that cuttings tend to develop roots more quickly. And, I can avoid awkward positioning problems when finally putting them in the soil.
Making the cuts
When making the cuts, make sure that you are using clean and sharp shears. This helps to avoid tears that can become infected and require more time to heal.
Here’s a little tip:
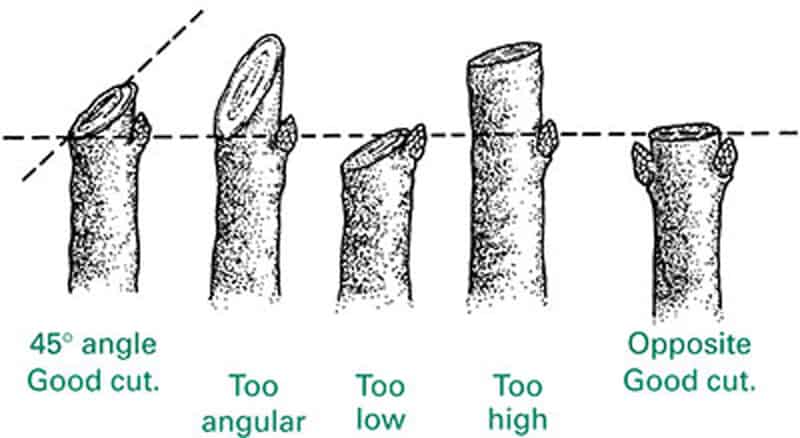
Cut at a 45-degree angle to maximize the surface area, allowing for greater water uptake and faster root growth.
Remove old sheathing
After cutting the plant, remove any old sheathing from the stem of the leaves– especially if you are planning to water propagate it.
I find that these sheathes tend to rot when they are left in the water too long.
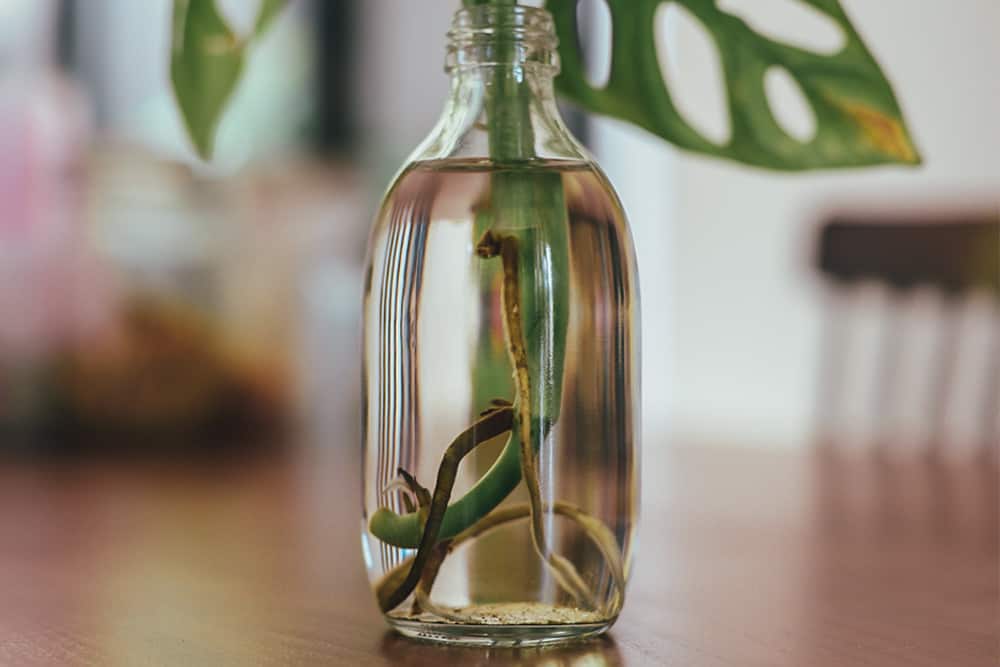
Option 1: Propagating in Water
- Before water propagating your cuttings, you can trim back their aerial roots to make them easier to fit into a vase.
- Next, you need to arrange the cuttings in a way you want to plant them in soil later. Once the new root system develops, you will not be able to reposition them around freely.
- Lastly, pour in filter water into the vase to cover the nodes and aerial roots. Don’t forget to replace the water every week.
- New roots typically develop in about two weeks, but it is best to wait until the roots are at least 2 inches long before putting the plant into potting soil. This usually takes one month.
Option 2: Propagating in Soil
Technically, the process of soil propagation is the same as transferring your water propagated cuttings into soil.
- You should fill half the pot with fresh well-drained and aerated soil before placing the cuttings.
- Once you have positioned the cutting, you need to put in more soil until the nodes are covered.
- You may need to stake larger cuttings with a moss pole or trellis for some time until the roots can form a secure foundation.
- Remember to water the plant thoroughly until water starts draining out of the hole at the bottom of the pot.
Option 3: Air Layering
There is another propagation technique that I came across recently called air layering.
Air layering is a process that forces the plant to grow its roots before you take a cutting; this way, your cutting will already be rooted when planted.
The process is not as hard as it sounds!
- Wound the stem below a node with clean sharp shears to stimulate root formation.
- Use garden ties to secure a piece of a plastic bag containing damp sphagnum moss around the wound.
- Poke some holes to allow oxygen in and prevent the moss from getting too damp and cause the new root to rot.
- Every 2 to 3 days spray the moss with distilled water to keep it moist
- After a month, remove the moss and check for the new roots’ growth. Cut away rotten roots if any.
- Use a clean pair of shears to cut off the stem from the mother plant, being sure to include the node and roots.
- As you finish, simply plant the cuttings into the soil just like you would with water or soil propagation.
Which type of propagation is best for Monstera?
In my experience, Monstera is a plant that propagates easily and I’ve had success with all three methods.
Here are some advantages and considerations for each method:
Water propagation
What I love about water propagation is that I am able to observe how the whole root growth process in action.
Changing the water in the vessel may seem like an innocent task, but it can actually cause stress to your plants over time. This process can stall the new growth of plants for a few weeks.
Soil propagation
Propagating in the soil is the most convenient out of all the other techniques. You’re already one step ahead because your cutting will eventually have to be potted anyways.
The downside of planting in the soil is you have no way of monitoring the roots. You might miss signs that some roots are rotting.
Air layering
This is my new favorite method of propagating Monstera plants. This method allows me to enjoy the advantages of both water and soil propagation without the disadvantages of either.
Air layering allows you to monitor the root growth while the sphagnum moss blanket reduces any shock to Monstera when transplanted into soil.
What affects propagation success?
No matter what method you choose, the following factors will increase your chances for successfully propagating the Monstera plant:
Consider propagating in Spring and Summer
Spring and Summer are the perfect times for propagation because Monstera is actively growing during this time.
Conversely, avoid propagating in Winter because the plant is dormant and will grow roots much slower. It also requires less water, so overwatering can increase the risk of rot or fungus on the cuttings.
Bright, Indirect Light and Warm Temperature
Maintaining warm and bright conditions helps increase the rate of rooting and provides the plant with the energy it needs to grow.
Generally, Monstera cuttings root best at a temperature between 73 – 75°F (23 – 25°C) and receiving bright, indirect light from an east-facing windowsill.
I would avoid introducing additional heating above 75°F, as this can stimulate the growth of pathogens and dry out plant tissues before roots start to form.
Proper Watering
The advantage of propagating Monstera in water is that you will not have to worry about the cuttings developing root rot.
However, cuttings in the soil should not be overwatered as this can lead to rotting. You will need to water about once a week or when the top 2 inches of the soil has dried out.
Optimal Humidity
The right humidity level allows the plant cuttings to stay turgid by balance water absorption and the rate of transpiration.
Ensure that the humidity is kept at 80% to reduce water loss, which can suppress growth and photosynthesis.
Soil mix
A poorly draining soil can cause issues with root rot. To counter this, I recommend adding a mixture of perlite and orchid bark to the ready-made potting soil; these ingredients will help aerate and ensure better drainage for your plant.
Water quality
I recommend the use of distilled or filtered water for any propagation method, although rainwater is an even better option.
Personally, I have had success using tap water to propagate my plants. However, it can cause salt buildup in soil over time which slows down Monstera’s ability to absorb water and nutrients resulting in poor growth.
Common Mistakes
I’ve never failed to propagate Monstera but there are common mistakes that often happen which can cause slower rooting and plant growth.
Signs that your cutting is not happy
When water propagating, it is easier to identify root rot formation. You simply need to trim back the black rotten roots and replace the water with filtered water.
If your soil-propagated cuttings stay droopy and curled for an extended time, you might want to take it out of your potting soil and check for root rot. Similarly, cut all the black roots before replacing them back into the soil.
Overwatering
Watering too often or potting the cuttings in poorly drain soil can cause overwatering. When the roots are waterlogged, they might rot and die because they cannot absorb the oxygen needed to grow.
Putting the monstera cutting in direct sunlight
You should avoid direct sunlight as it increases plant temperature, speed up transpiration and cause the cutting to dehydrate quickly. Not to mention, it can also burn your Monstera leaves.
Using blunt shears
Lastly, make sure to always use clean and sharp shears when cutting your cuttings. A blunt shear may cause tearing on the stem which will take longer to heal and expose both the cuttings and its mother plant to disease or infection.
In conclusion
Monstera is very easy to propagate, but there are a few considerations that must be made before making the cuts.
While soil propagation is most convenient, new plant owners might want to try water propagation or air layering first as it provides less risk of root rotting
Always provide the Monstera plant with proper care and this will result in happy and healthy cuttings!
